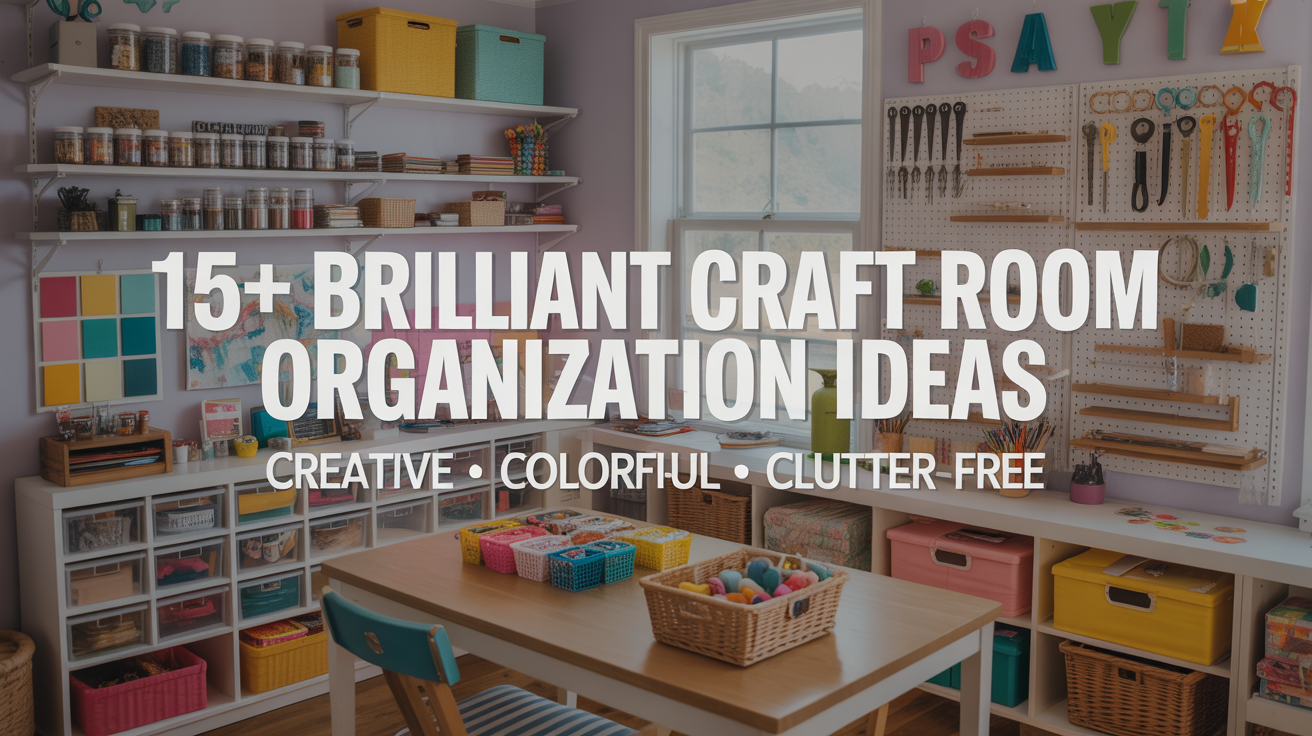
15+ Brilliant Craft Room Organization Ideas for a Creative, Clutter-Free Space
1. Create a Smart Layout That Fits Your Workflow
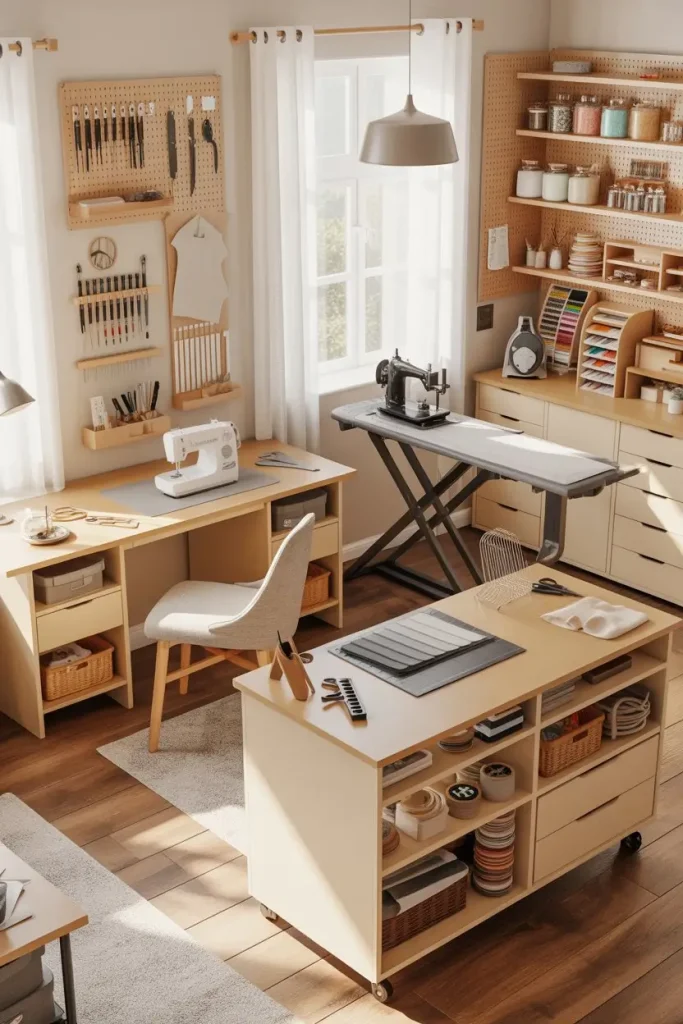
The first step to an organized craft room is designing a layout that flows with the way you work. If you often cut fabric, sew, and then press, your stations should sit close together in that order. Paper crafters may prefer a large central table with shelves surrounding it for stamps, dies, and cardstock. When the flow is natural, you spend less time moving supplies around and more time creating. Think of your craft room as a workshop. Every tool should live in the place where you need it most. A well-planned layout is the backbone of every organized space.
2. Use Vertical Space with Wall-Mounted Storage
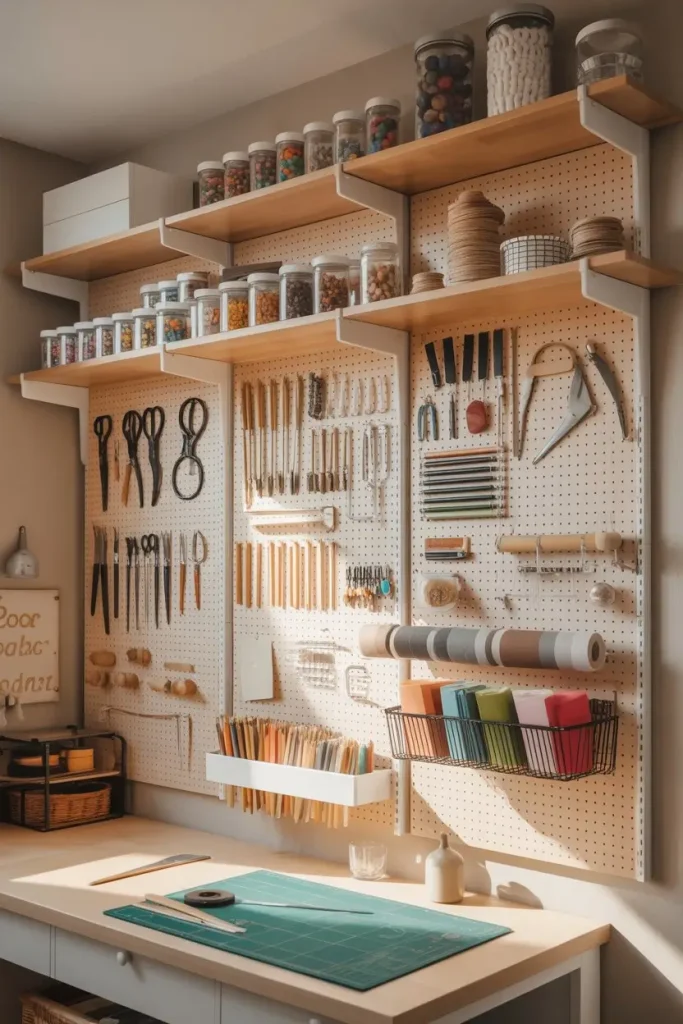
Most craft rooms feel cluttered because the storage only spreads across the floor. Walls often go unused, yet they can hold an incredible amount of supplies. Pegboards, shelving units, magnetic strips, and even mounted baskets help turn vertical space into smart storage. You can hang scissors, rulers, ribbons, or small jars of buttons where they stay visible but out of the way. When everything has its place on the wall, the work surface stays clear and open for projects.
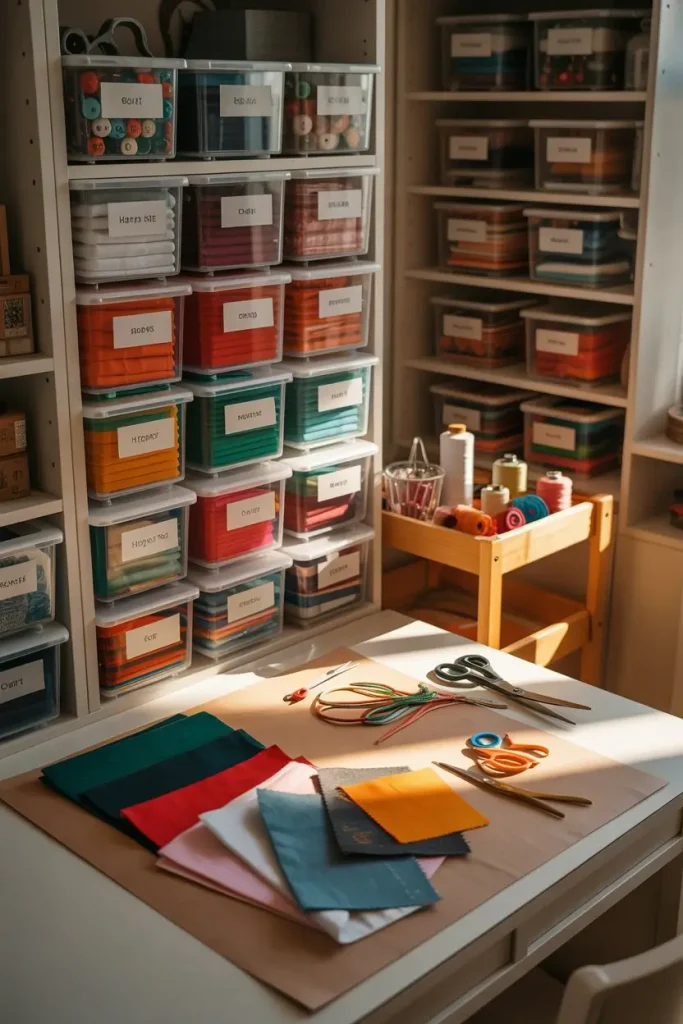
3. Add Clear Containers for Easy Supply Visibility
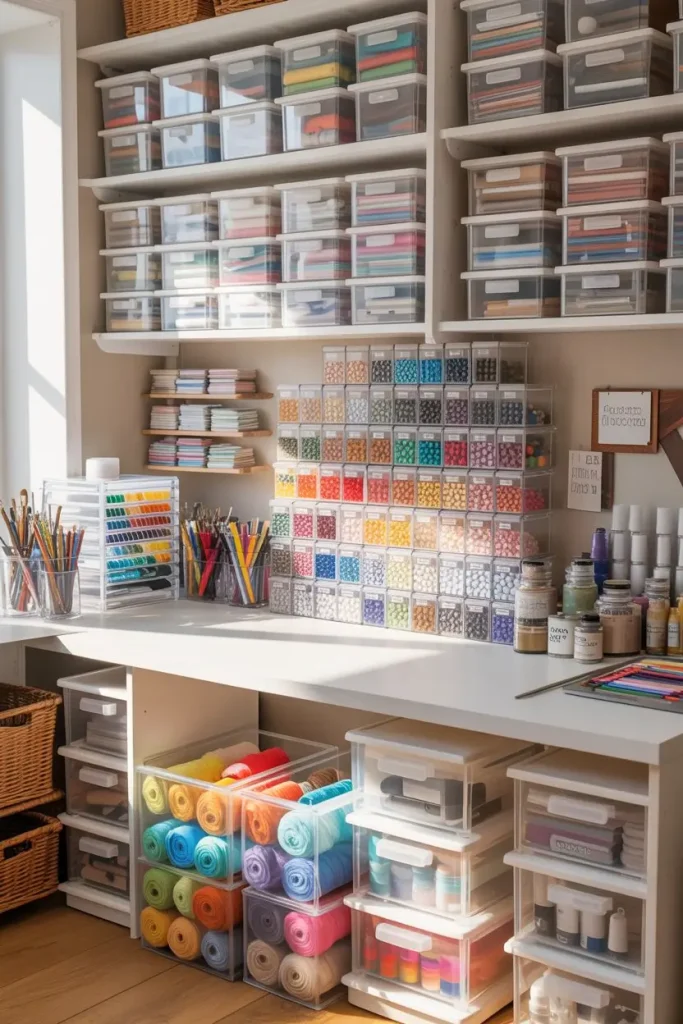
Opaque boxes hide what’s inside, which usually leads to messy rummaging during projects. Clear containers solve that issue instantly. Whether you use acrylic bins, glass jars, or plastic drawer units, being able to see inside saves time and prevents duplication when shopping. Group items by type—like beads in one container, paints in another, or yarn in large bins—so you can grab what you need in seconds. Clear storage not only helps with function but also adds a visually pleasing, colorful touch to your craft room.
4. Label Everything for Instant Organization
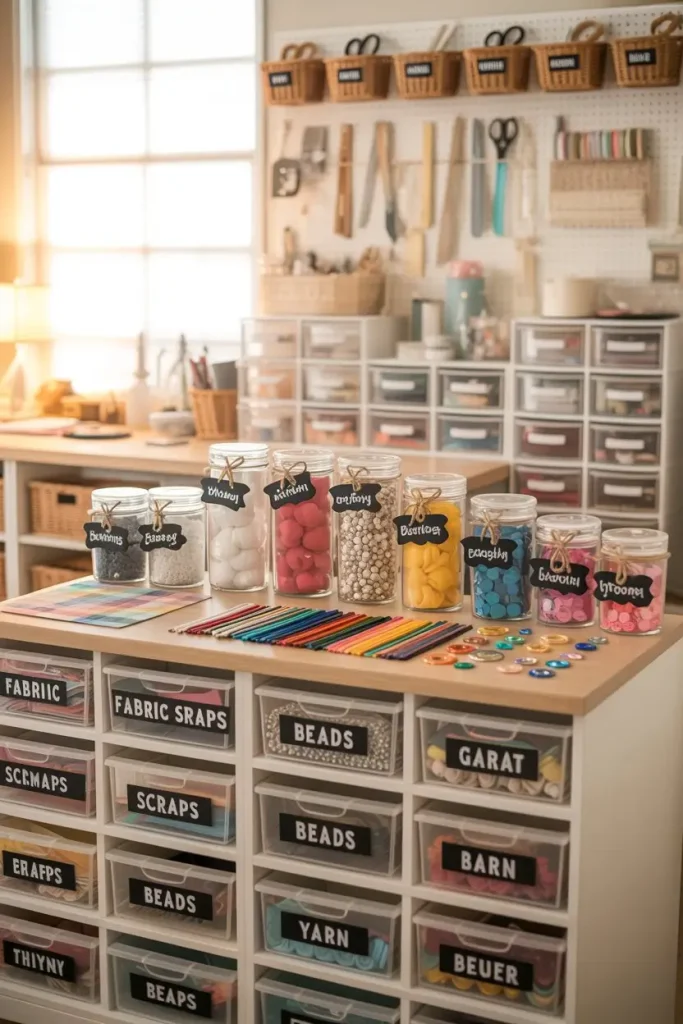
Even when using clear storage, labels make a world of difference. A quick glance at neatly printed or handwritten labels tells you exactly where items belong. The best system uses broad categories instead of overly detailed ones. For example, a label saying “Fabric Scraps” is easier to maintain than “Cotton Fabric Scraps Smaller Than 6 Inches.” Labels reduce stress, speed up cleanup, and keep family members or kids from misplacing your supplies.
5. Create a Central Work Table with Ample Space
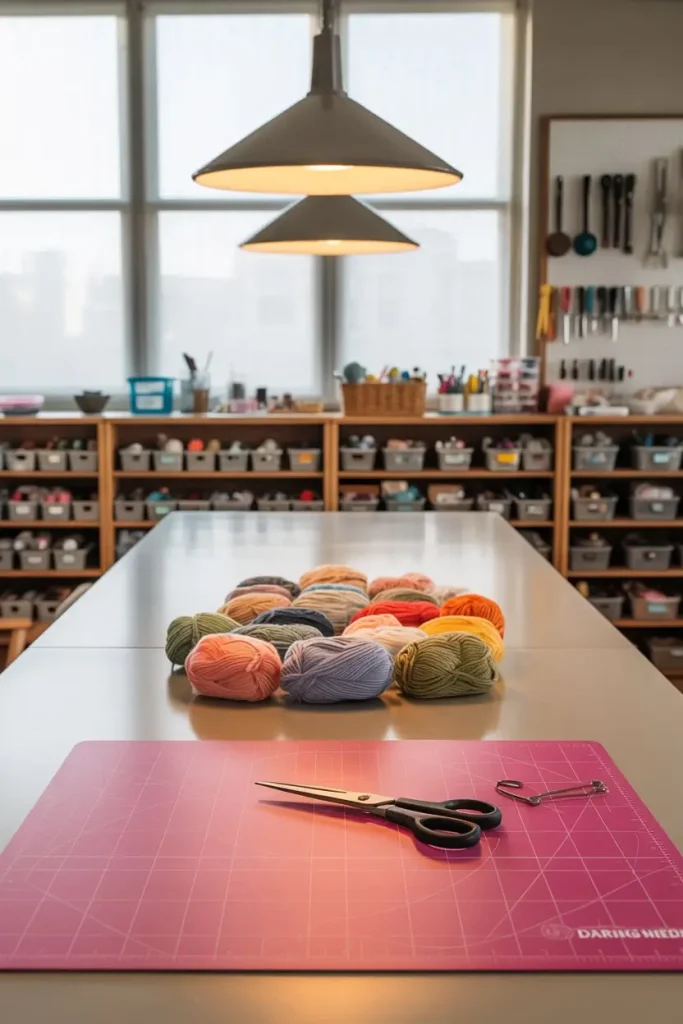
Every crafter needs a large, sturdy work surface. A central table allows you to spread out your materials without knocking things onto the floor. If possible, choose a table with built-in shelves or drawers underneath to keep tools within reach. A counter-height table can be more comfortable if you prefer standing while working. The key is balance: the table should be big enough for projects but not so large that it overwhelms the room.
6. Designate Zones for Different Crafts
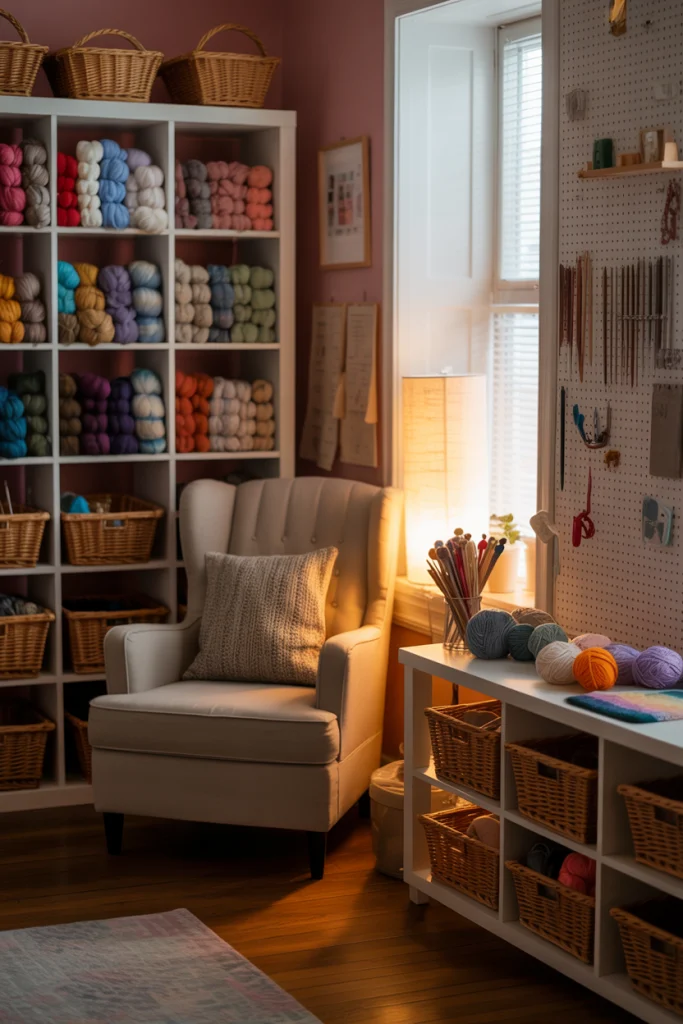
Many creative people enjoy more than one craft. You may knit, sew, scrapbook, and paint all in the same room. The secret to keeping it under control is zoning. Each craft gets its own corner or storage zone. That way, yarn doesn’t end up mixed with paints, and sewing supplies don’t take over the paper section. Even in a small room, zones can be created with shelves, carts, or dividers. This method makes it easier to switch from one project to another without chaos.
7. Use Rolling Carts for Flexible Storage
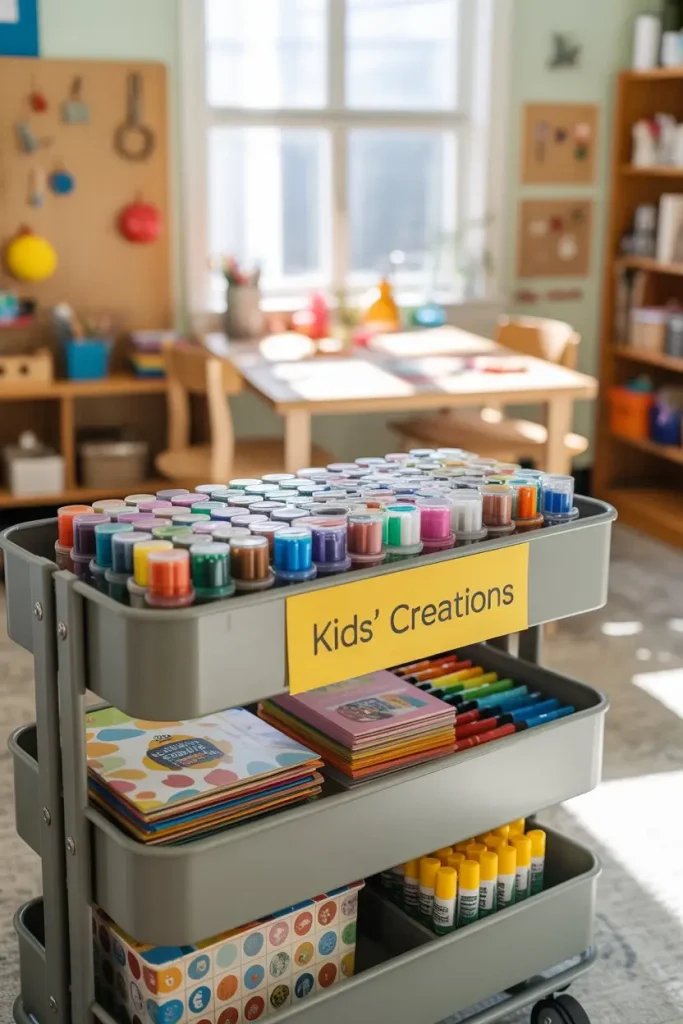
Not all supplies need to stay in one spot. Rolling carts are lifesavers for portable storage. You can keep painting supplies in one, sewing notions in another, or kids’ craft materials in a third. When it’s time to create, simply roll the cart to your work area. Once you’re finished, wheel it back against the wall to free up space. Rolling carts are also excellent for shared spaces, like dining rooms or small apartments, where the craft area doubles as a living space.
8. Install Adjustable Shelving for Long-Term Flexibility
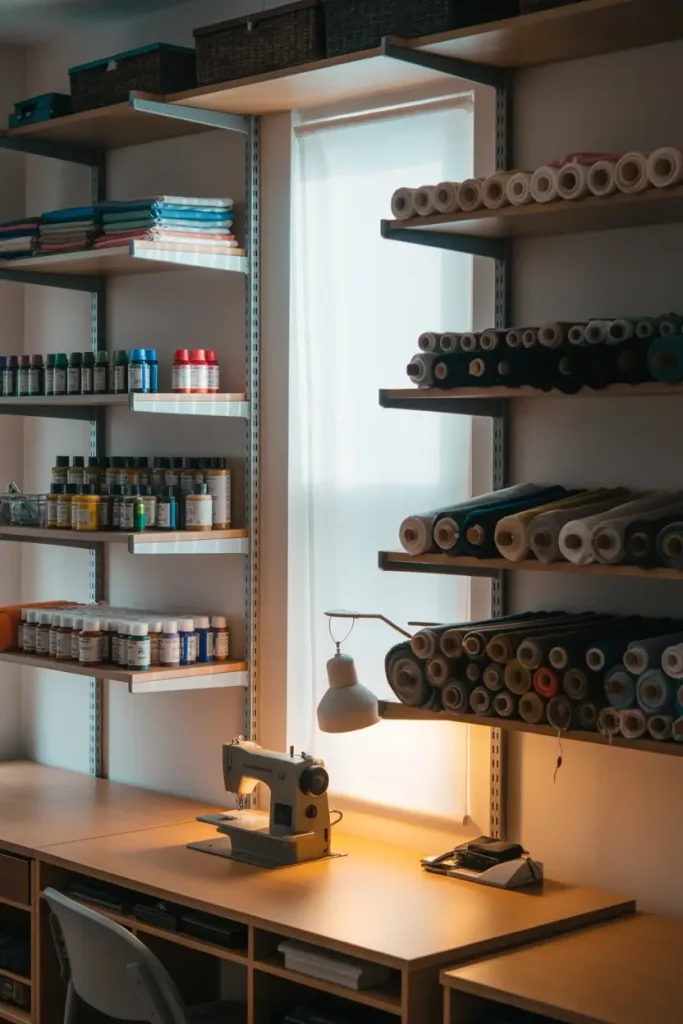
Your crafting habits will change over time. Adjustable shelving gives you flexibility as your collection grows or shifts. Instead of buying new furniture every year, you can move the shelves higher or lower to fit new tools or larger bins. Adjustable shelving systems are strong, versatile, and can adapt whether you’re storing tiny stamp pads or bulky fabric bolts. Investing in this type of system once can save money and clutter headaches later.
9. Keep a Clean Surface with Wall-Mounted Tools
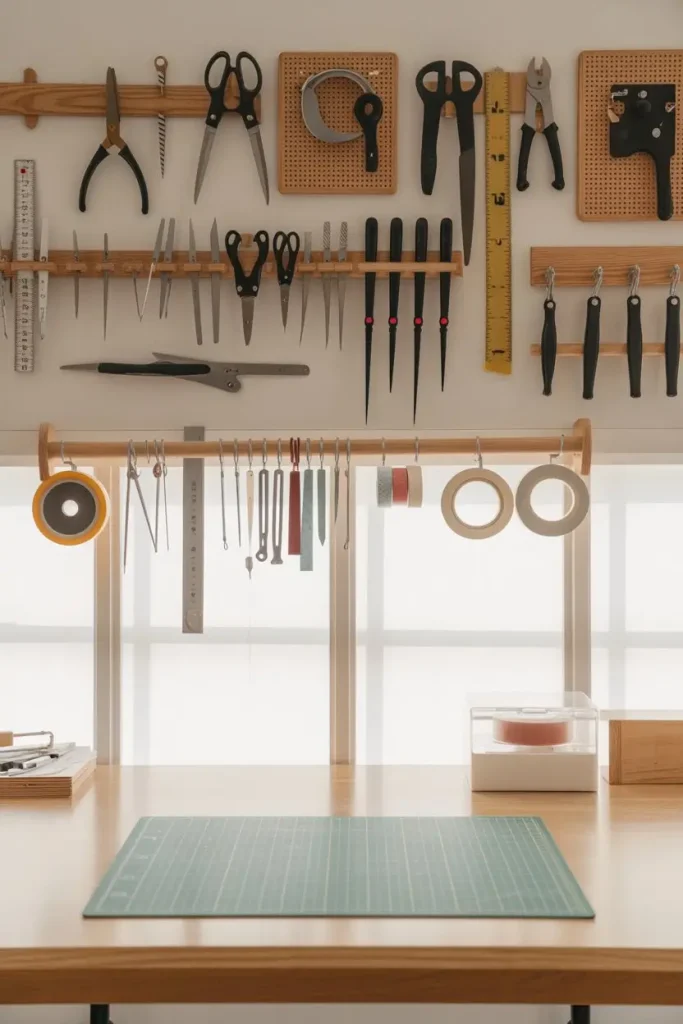
Tools like scissors, tape dispensers, rulers, and cutting mats often end up scattered on the table. To prevent that, mount them on the wall or hang them on pegboards. Some crafters even use magnetic knife strips to hold metal tools. Keeping tools off the table ensures that you always start with a clear workspace, which helps creativity flow better. Plus, mounted tools stay visible and ready to grab without digging through drawers.
10. Store Paper Upright Instead of Flat

For scrapbookers and paper crafters, storing paper flat often leads to bent corners or forgotten designs at the bottom of the pile. Upright paper storage, using magazine holders, vertical racks, or cube shelving, keeps sheets crisp and easy to flip through. Sorting paper by color, size, or type also prevents wasted time hunting for the right sheet. Upright storage doubles as decor too, showing off the rainbow of papers you own.
11. Use Jars and Canisters for Small Items
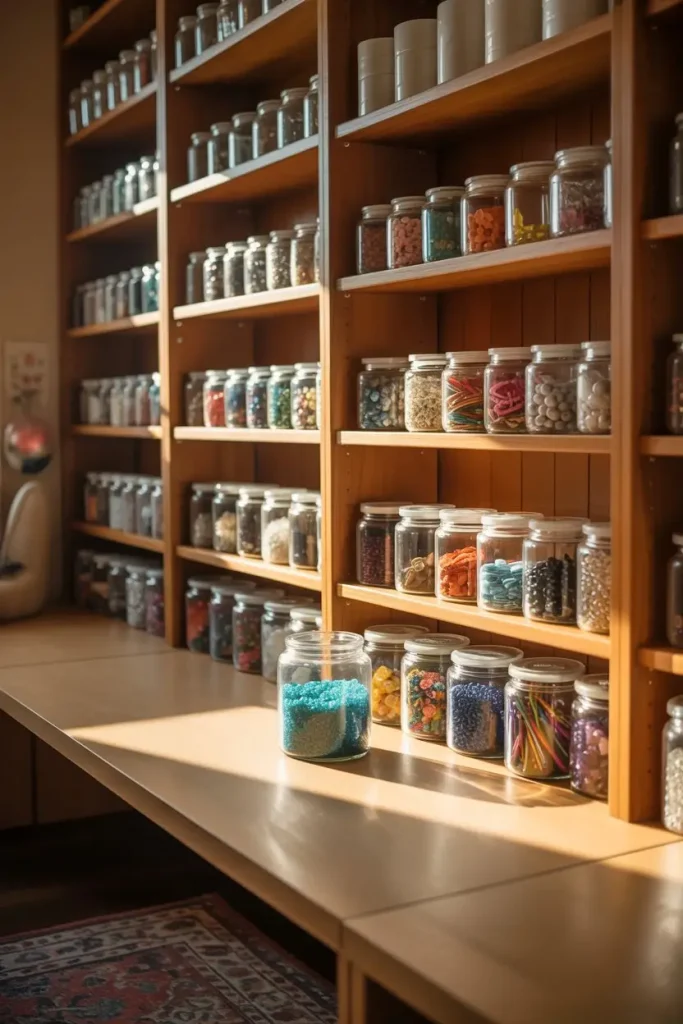
Beads, buttons, pins, and other tiny supplies get lost easily if not stored properly. Jars and canisters make perfect homes for them. Glass jars allow you to see inside, while metal or ceramic options add style. Group jars on open shelves or inside cabinets, keeping similar items together. When you can reach into one place for all your small parts, projects become smoother and less frustrating. This method also makes cleanup faster after crafting sessions.
12. Create a Pegboard Command Center
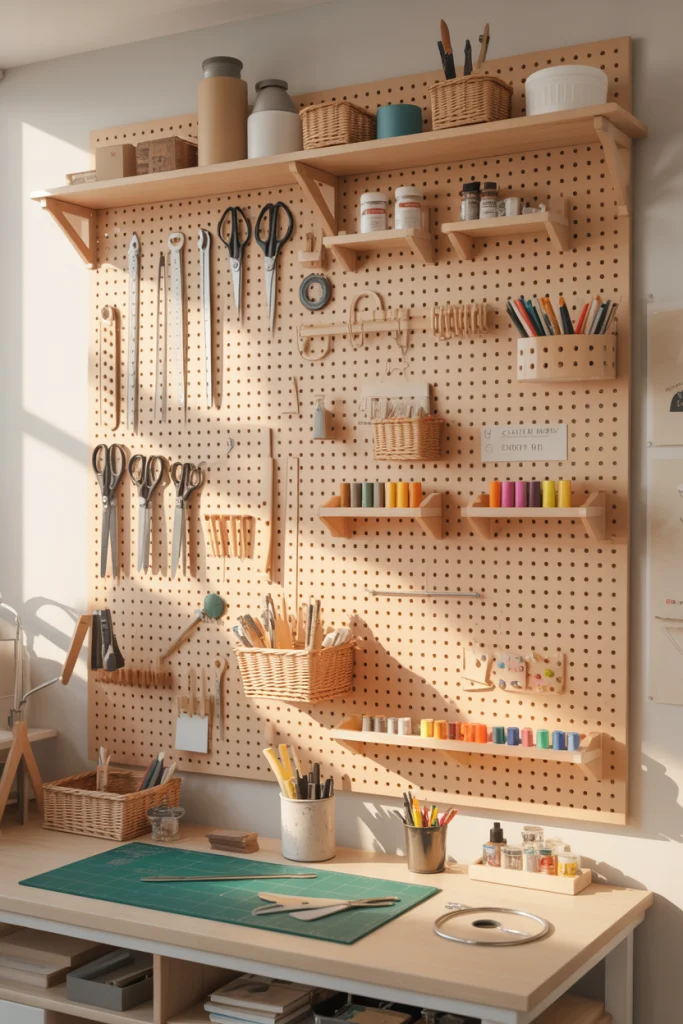
A pegboard is one of the most powerful tools for craft room organization. It adapts to your changing needs with hooks, baskets, and shelves. You can create a full command center with scissors, rulers, tape, ribbon, and even small bins for paints. The beauty of a pegboard is its flexibility—if you try a new craft or need to reorganize, you simply move the pieces around. Pegboards also keep supplies out in the open, which often sparks fresh creative ideas.
13. Dedicate a Closet or Cabinet for Bulk Storage
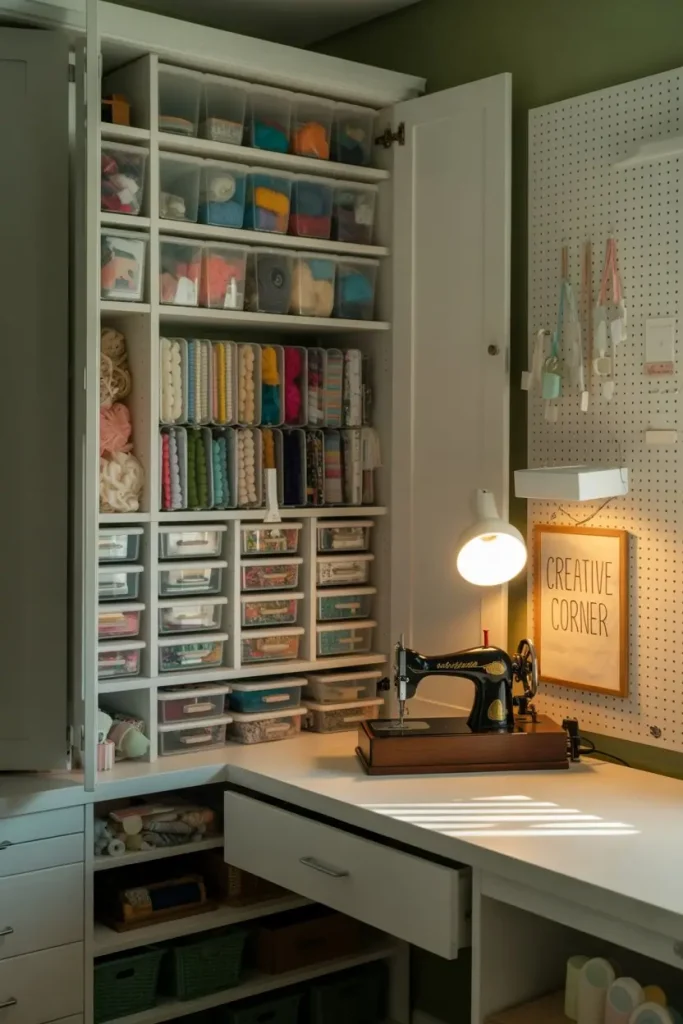
Not every supply belongs out in the open. Some materials are bulky, seasonal, or better kept out of sight. A closet or tall cabinet provides hidden storage for these items. You can tuck away sewing machines, extra yarn, or large canvases when they’re not in use. Adding shelves, pull-out drawers, or stackable bins inside the closet maximizes every inch of space. Keeping big items behind closed doors also helps the room feel cleaner and calmer.
14. Add Lighting That Supports Creativity
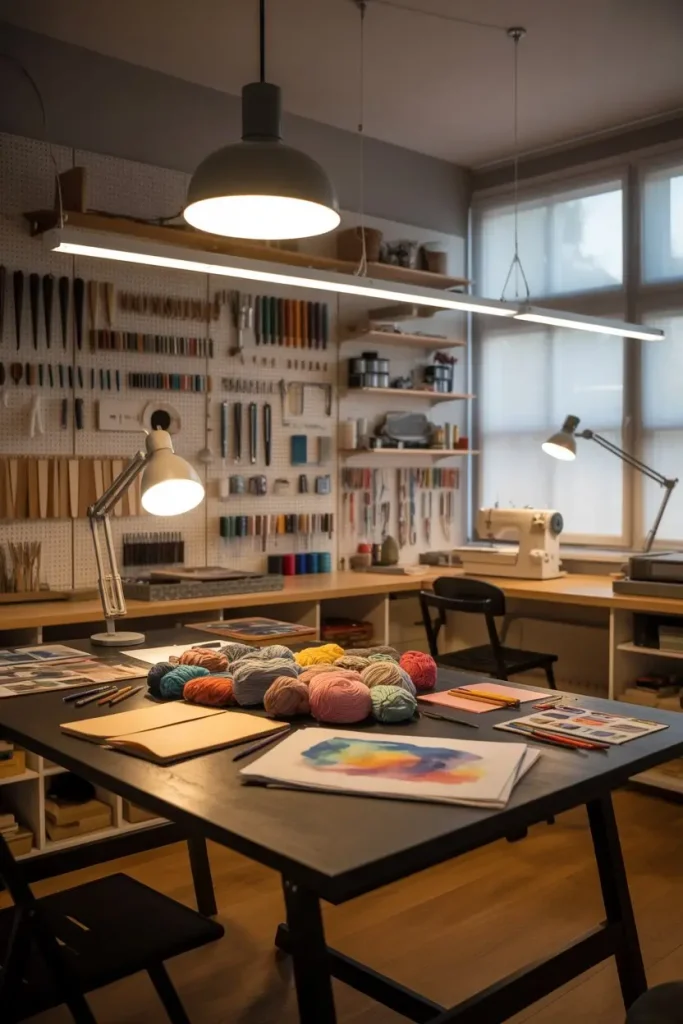
Organization goes beyond storage. Proper lighting is essential in a craft room. A combination of overhead lighting and task lighting prevents eye strain and helps you see colors accurately. Under-shelf lights, desk lamps, or even mounted spotlights can brighten specific areas. A well-lit room makes supplies easier to find and projects easier to complete. When your workspace feels bright and welcoming, you’ll naturally stay more organized because you can see everything clearly.
15. Incorporate Furniture with Dual Purposes
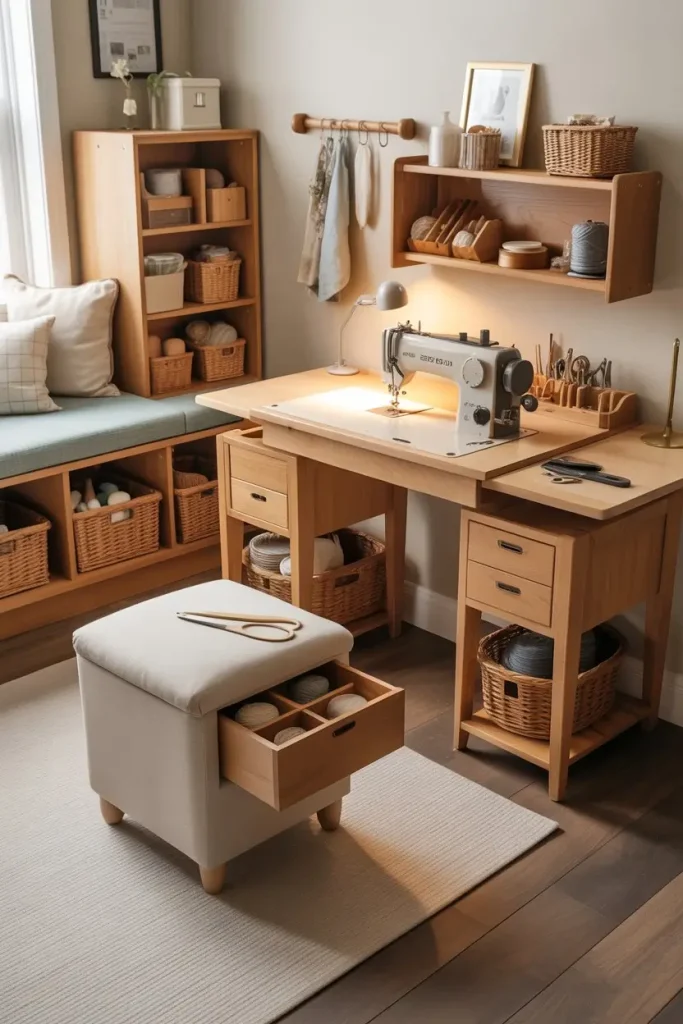
In smaller craft rooms, every piece of furniture must work harder. Consider furniture with hidden storage, such as ottomans, benches, or tables with drawers. A sewing table can double as a cutting surface if designed with fold-out leaves. Storage benches along the wall offer both seating and hidden compartments for supplies. When furniture serves more than one purpose, you reduce clutter while keeping the room functional and stylish.
16. Keep an Inspiration Board or Display Wall
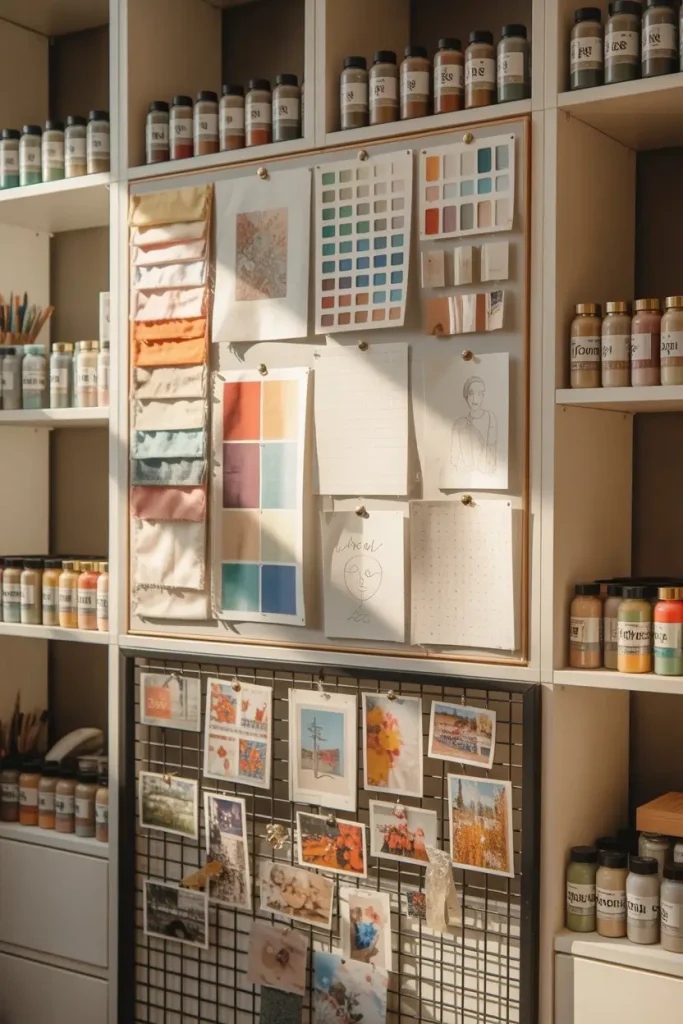
An organized craft room isn’t just about storing supplies; it’s also about fueling creativity. An inspiration board or wall helps you track ideas, sketches, or favorite fabrics. Having a visual display keeps your current project in focus and prevents supplies from being scattered across the table as reminders. Display walls also give the room personality, making it feel like your personal creative studio rather than just a storage zone.
17. Rotate Seasonal or Project-Based Supplies
If you work on seasonal crafts, it doesn’t make sense to keep all supplies out year-round. Store holiday-specific items in labeled bins and rotate them as needed. For ongoing projects, dedicate a small box or tray that holds everything related to that project. Once it’s complete, return items to their main zones. This prevents piles of unfinished work from overwhelming your craft table and helps you focus on one task at a time.